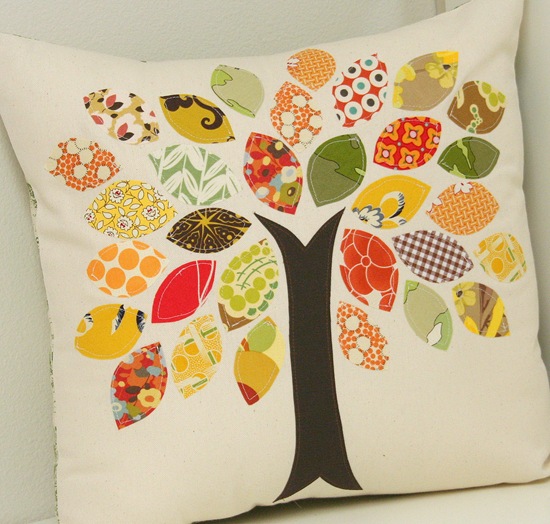
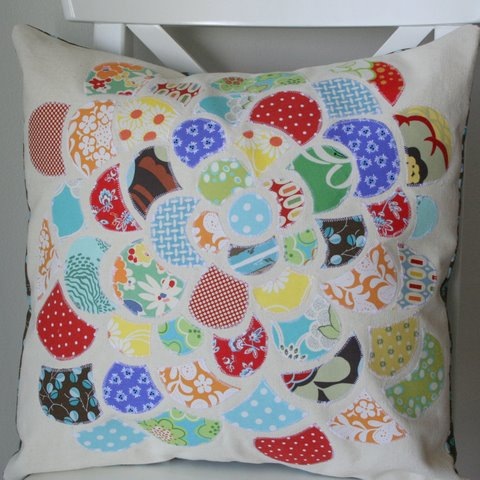
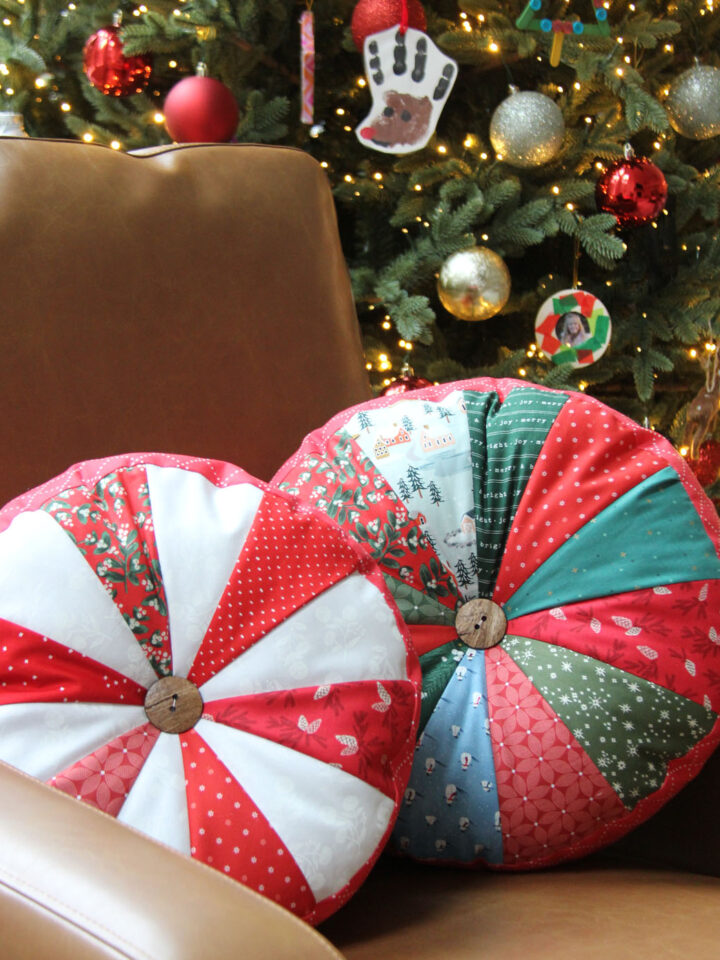
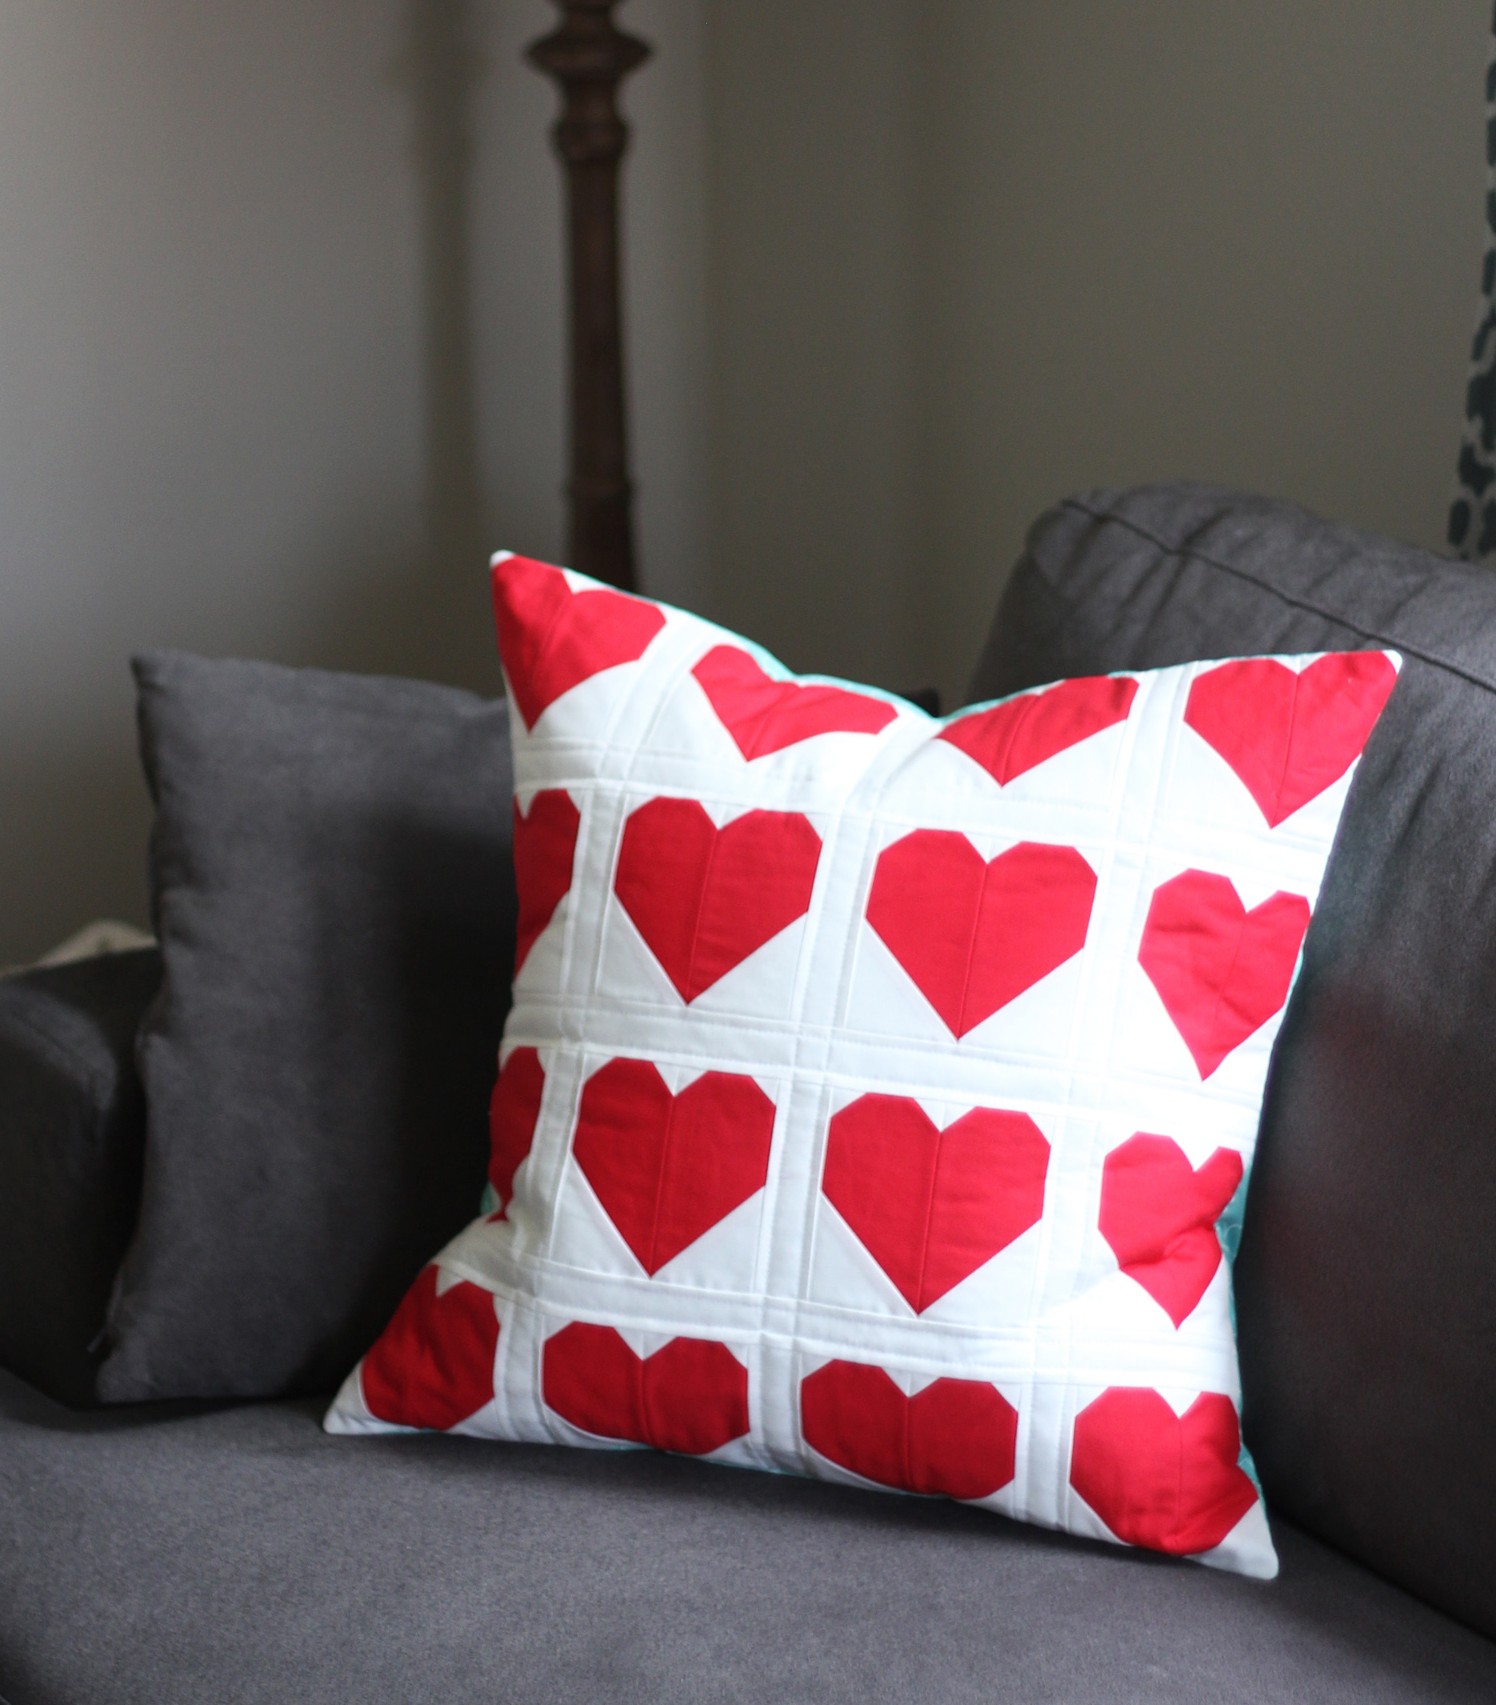
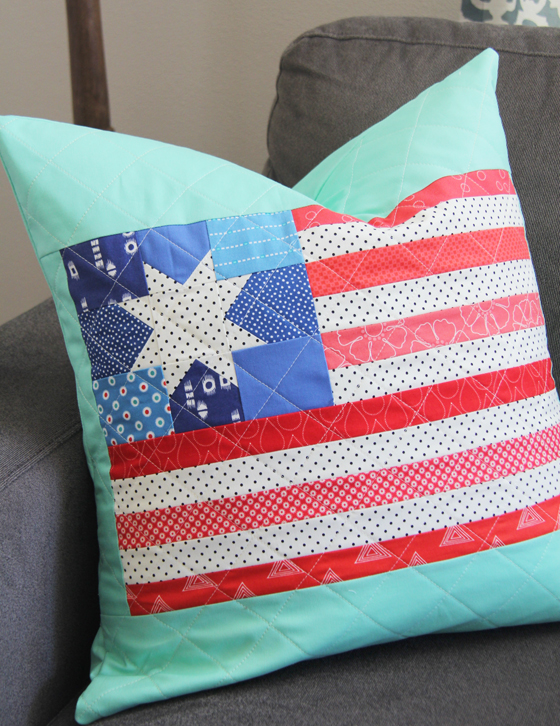
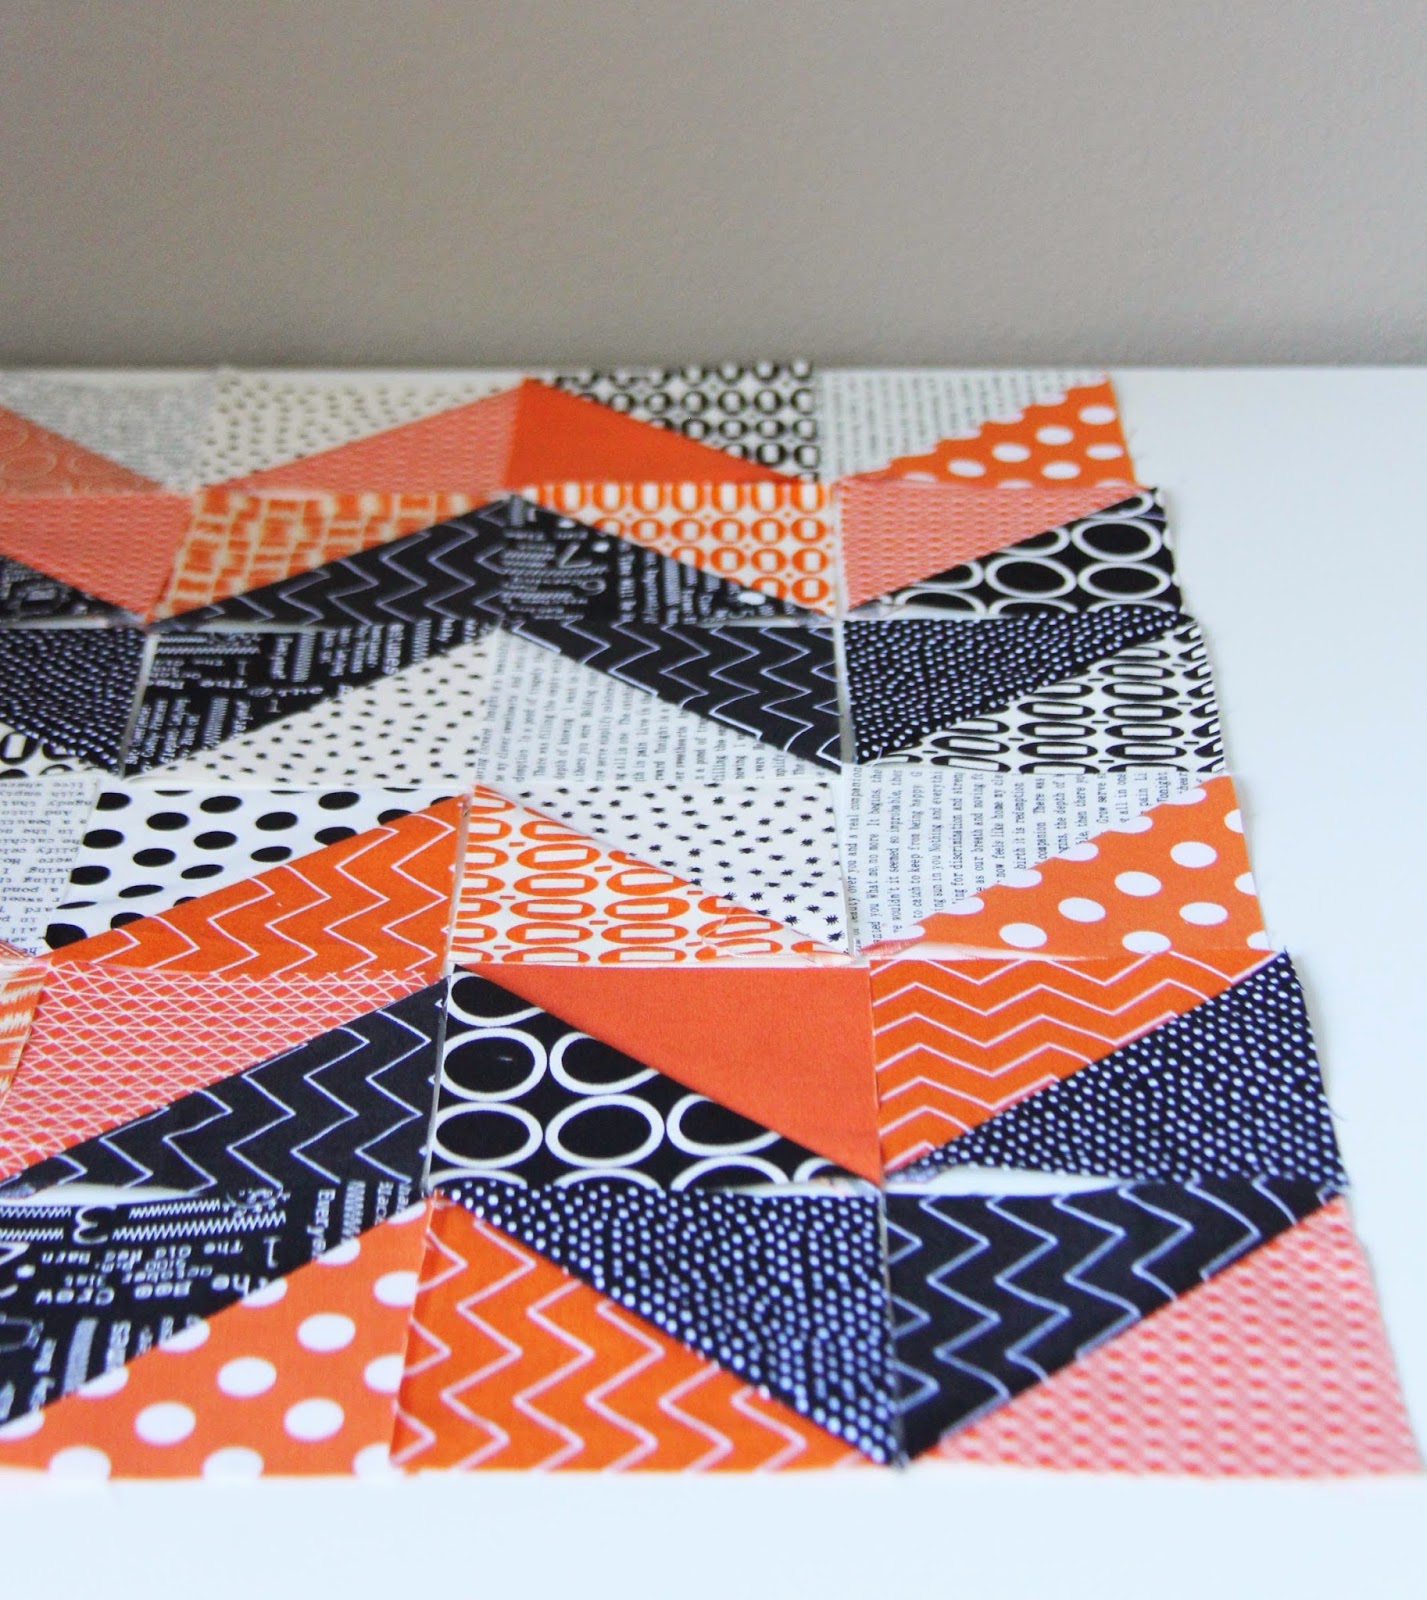
This is my favorite thing to do with my little scraps, and since its Scrap Buster month over at Sew, Mama, Sew, I made a quick tutorial so you can make your own. This pillow cover is 16" square with an envelope back & the design possibilities are endless! I added some pillows I’ve previously made with this same method at the end of this post. Happy Sewing!
You’ll Need:
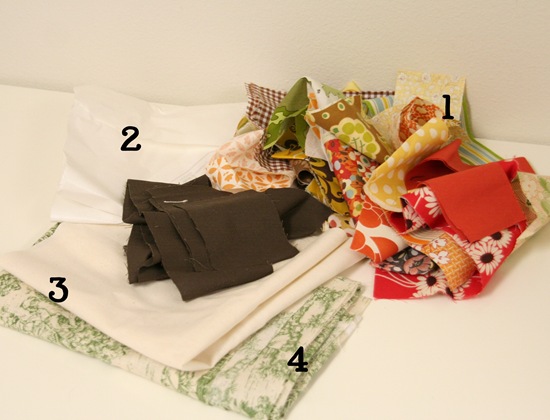
1. Scraps, enough for the tree trunk and the leaves. Cutting your scraps into rectangles will make it easier to adhere them to the appliqué material.
2. Appliqué material: I use Heat' n Bond. You’ll need about ½ yard or more depending on how many leaves you want to make.
3. Material for the pillow front, cut to 17" x 17" square. I used lightweight canvas and prefer home weight material, but you could use anything.
4. Material for the back. Cut 1 rectangle 17"x 14" and cut 1 rectangle 17"x 10".
![IMG_1153_thumb[2]](http://cluckclucksew.com/wp-content/uploads/2009/10/IMG_1153_thumb2.jpg)
Iron your fabric scraps onto your appliqué material according to the directions on the appliqué material. (press & hold the iron over each scrap for a few seconds, I use a very hot iron and find the appliqué material sticks better)
![IMG_1157_thumb[2]](http://cluckclucksew.com/wp-content/uploads/2009/10/IMG_1157_thumb2.jpg)
Now with scissors cut out your trunk and leaf shapes. For the trunk I first draw the shape of the trunk on the back of the appliqué material so I get a nice shape, but for the leaves I just free cut as I go. And for reference the trunk on mine is 8" tall, and my leaves are all about 2.5" long and are 1.5" or so wide.
When you get all your leaves cut out, tear the backing appliqué paper off the leaves and trunk. I prefer to do this while plopped down in front of the TV cause it takes awhile. :) Or better yet enlist some help.
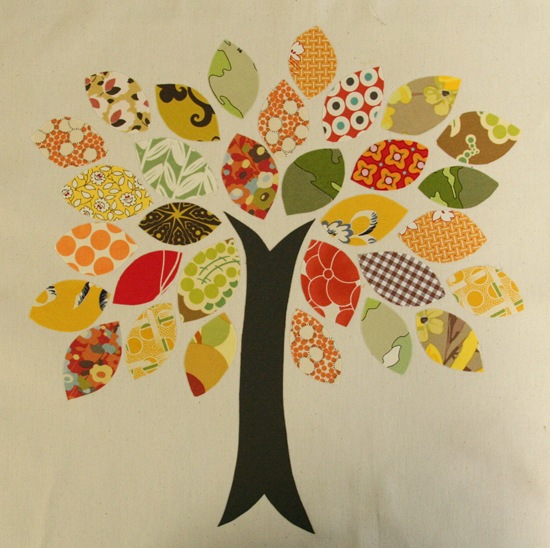
Then you can arrange them how you want on your pillow front. Don’t place any within an 1.5" of the edges to leave room for sewing.
Once your design is how you like it, press with an iron over each spot for a few seconds making sure not to bump anything out of place. This will keep everything in place while you sew them on.
![IMG_1164_thumb[1]](http://cluckclucksew.com/wp-content/uploads/2009/10/IMG_1164_thumb1.jpg)
Now you can sew either along the inside edges of your leaves, or you can do a zig zag stitch or blanket stitch around the edges if you prefer. I move my foot from leaf to leaf without cutting my strings so it goes faster, then go back and cut my strings at the end.
![IMG_1165_thumb[1]](http://cluckclucksew.com/wp-content/uploads/2009/10/IMG_1165_thumb1.jpg)
To prepare your pillow back, fold one of the short edges of each pillow backing piece in ½" and press, then again ½" and press and sew to hide any raw edges. These will be the edges of the envelope back.
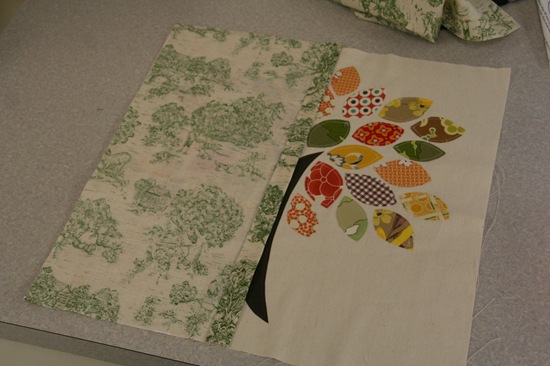
Lay the backing pieces right sides down onto the pillow front over lapping the centers. I placed the smaller backing piece ( 10" x 17") down first on the pillow front, but I actually prefer to lay the larger pieces down first since it makes the cover easier to slip on. Either way, make sure your right sides are facing towards the right sides of your pillow front and your outer edges match.

Pin around the edges well. Sew with a ¼" inseam around the edges, backstitch over the envelope openings for extra strength. After the initial sewing I go around the edges with a serger, pinking shears or a quick zig zag stitch. Its especially important if you are using home weight fabric which tends to fray easily. Then clip your extra corner fabric off so the corners will turn nicely.
![IMG_1180_thumb[3]](http://cluckclucksew.com/wp-content/uploads/2009/10/IMG_1180_thumb3.jpg)
Then turn it inside out and stuff a 16" pillow form in it.
Here are some pillow covers I previously made if you want more ideas and to see how it looks with the zig zag stitch around the pieces.
![3428224034_df87731e28_o_thumb[1]](http://cluckclucksew.com/wp-content/uploads/2009/10/3428224034_df87731e28_o_thumb1.jpg)
Hope
gorgeous! Thanks so much for the tutorial :)
Donna
I absolutely LOVE your idea! This is going straight to the top of my to-do list! Thanks for the great tutorial.
Jamie
That is super cute! Guess what's added to my "to do" list?! Thanks for the tutorial and great examples.
Natalia
VERY cute! That's such a great idea!
Lisa
Lovely idea, thanks for sharing
connie
I love this idea. I will have to do some of these. I too just love scraps!!!
jodi @ Pleasant Home
Very Very Cute !!!!
bruinbr
I LOVE this! I adore your pillows and always wondered how you did it! :) Thanks so much for sharing!
Julie @ Joy's Hope
I love it!!! It even makes me like fall, which is my least fave season. Happy scraps too. Thanks for the great tute!
allsewnup
This is so awesome, I've got a ton of scraps and some tired looking pilow covers.
:o)
Carolyn
Andi
Stunning!!!!
Lorraine
Fantastic ... thanks
CJ
Ohhh, this is so cool! I love your pillows and thank you so much for the tutorial! I think I might make one of these to match my daughter's quilt (from the Red Barn Quilt Along this summer)!
Can you tell me roughly how BIG your tree and leaves are?? I have no clue where to start on size.
Lucy Locket-Pocket
What a gorgeous idea! Thank you! Lucy x
Goddess in Progress
LOVE! Thank you so much for the tutorial. This may just get me over my irrational fear of applique and give it a try! :-)
Liz @ teeny tiny quilts
Kathy
I'm the proud owner of the first of the "previously made" pillows and I get all sorts of compliments on it whenever anyone comes over! Thanks again!
andrea creates
Oh this pillow is great- I have basket loads of scraps too-and I need new pillows-perfect :)
Beth
Fantastic tutorial. I love the tree image too! I've used it on handmade photo albums for my kids, but on a pillow? That would be divine.
randi---i have to say
Too cute! Thanks for the how-to!
Sandy Workman
Love love love it! I am going to link from my store blog, my customers will love this and will love your blog!
Sandy
pineneedlesblog.blogspot.com
Ashley
What a cute idea. I love it!
RosaMaría
great job!!! you have fantasdtic scrapps!!!
Amanda
Thanks for sharing. I have no pillows in my living room yet, and this is something I can do with limited time. (little boy two years old tomorrow and a 7 month old momma's girl)
Leslie
these are so beautiful!! what a great idea...thanks for sharing.
Phyllis
Thank you SO much for the tutorial!
Jingle
These are gorgeous! What great ideas!
Kari @ Ucreate
These pillows are so FABULOUS!! I'll be featuring today!
tina cockburn
What a cute idea! I might just make one of these this weekend!
Michele
So stinkin' cute! There goes laundry today! Thanks!
L
Very cute! What a great Christmas gift this would make. I would love to see a tutorial or even just a link on that adorable strip table runner you posted a few months ago. I looked all over the internet and could not find it any where. Just an idea!
lyndsey
Melanie
Thanks, I've been admiring these pillows of yours for a while, I am excited to do one of my own!
Katie
These pillows are wonderful! Thanks for sharing!
Shannon
Um, Amazing! Love it, and it doesn't look too terribly difficult. Great job!
*ayliz*
çok güzel ama kumaş kenarları yıkandıkça iplik çıkarmazmı ama süper fikirmiş aynı işlemi yastıklarımızada kullanabiliriz ama iplik çıkartır mı diye düşünmüyor değilim
Karen
FANTASTIC pillows and tutorial!!! I'm always so inspired when I read your blog!
Can't wait to try this out!
erin
LOOVE that!!!! thank you for this tutorial!!
Alicia
So! Stinkin'! Cute! I LOVE this pillow!
Tegan and Tage
Gorgeous! I would love to try that!!! (Found you from U Create... great blog. :)
SG
Great tutorial! Thanks! The pillows are gorgeous!
Sue
These are so cute I can't even stand it! Great idea!
Blue Is Bleu
So gorgeous!!! Love your pillows :)
Heather
The pillows are awesome! I’m thinking Christmas gifts, and new pillows for my bed… oh dear. Thanks for the tutorial!
Vals Quilting
Thanks so much! I love fall and I love trees pluming with leaves so refreshing to look at - your white background is perfect!
Valerie
http://www.pastimesonline.ca/vals-quilting/
Libby
Impressive! You're bursting with great ideas. Now, it's official - I'm torn between my crafts! :-)
Simply Sandy
Thanks for the great tutorial. I'll have to give it a try. By the way, I love your blog!
Twiddle Thumbs
WOW! This is awesome!!!
GloJoeSews
What...omg it's just too cute! And u make it look so very simple. I love it!
Tiffany
Great scrap buster!
Jennifer
Wow, this is great! I totally want to make one of these! I'm imagining all sorts of other designs as well...how cool! Thanks.
Rachel@oneprettything.com
Whoa... I'm blown away by the amount of beautiful handmade creations and tutorials there are here. WOW! I just clicked over from Sew, Mama, Sew! and I'm so glad I did. This pillow is wonderful, it's totally going on my gotta-make-it-list. And I would LOVE to link to some of your tutorials on my blog if you didn't mind. They're fantastic!
mjb
I love seeing how you do all the fabrics on the fusible at once. Saves so much time!
Lizzy
Love this! I featured you on my blog, Will you be offering these for sale ?
~Lizzy
Simone de Klerk
Thank you for the great tutorial!!!
sallgood
So cute! And I LOVE scrappy for so many reasons- this is a great use of even the smallest bits!
KQuiltyBee
This is a great technique for fusing those scraps. Thank you!
Ariane
I love this tutorial. It's so great. I have a bunch of new ideas in my head already. Thanks for sharing this with us. I can't wait to get a bit of time to start on my scrappy project.
lynnie
what a great idea! I've got some orange scraps that would love to be leaves on a pillow. Thanks for this!
nan ran
Thank you for sharing your tutorial with us. I went and purchased some wonder under to try this out.
Robin
I LOVE these! I want to make a set in fall colors and one in spring colors to switch out!
Aimee
Love it! Thanks for the tutorial!
Jaime
So fabulous!!!!
Bethany
Thank you for the fantastic idea! Just beautiful. We are doing a "homemade Christmas" this year and this is a perfect project.
Marcia
Love it! What a great idea. I really like pillows too. Yours is a simply elegant idea. Thanks for sharing.
Billie
This is just too cute!! Another good use for scraps!
amandajean
those are really really cute pillows!!! hurray for using up scraps!
Ashley
Thanks for sharing...this is such a cute idea and seems easy enough for a novice seamstress like myself! Can't wait to try it
Mary
I just went out and bought some applique material. You've inspired me to try it out!
Lia
that's a brilliant idea! Would be a great present for someone :)
Franzi
coming from this page Hyggelig I'd like to thank you for the tutorial. I have so many scraps left, I will definitely do something like this. So cool.
Bec
I LOVE this!!!! So cute!
renae
Oh wow! I'm adding this to my list of cushion projects I currently have on the go!
Laura
gracious sakes alive. in. love.
Gigi
wow! this is fabulous!! thank you!
sewing_passion
So pretty. I love your choices of scraps for this project.
katevet
gorgeous!
Jody
beautiful idea!
Alex
Adorable. I'm going to run right home and make this.
von Hand zu Hand
really fantastic.
i love it.
thanks for sharing the tutorial.
i set a link. i hope y'll agree.
thank you, doro.
Petrina McDonald
very cool! thanks for sharing :)
jen
i love your pillows! i've been wanting to do something similar but wasn't sure how to go about it. thanks for the tutorial!
forever folding laundry
LOVE them. They are just like the pillows Anthro was carrying awhile back. Great tutorial - thank you!!
Tasha Horsley
oh i love this idea! i really hope to use it someday!!!
brzeski
These are really beautiful. Such a great idea - thanks for sharing it along with the extra design suggestions. I'm headed over to vote for you in the Scrap Buster poll! :)
Quilted Cupcake
I couldn't wait to try this technique - I made mine into a wall hanging. I'll post pics on my Flickr, and mention on my podcast. Thank you, thank you, thank you.
free indeed
wonderful way to update a throw pillow for any room!
two of a feather
love these pillows! bought some "scraps" today and trying it! thanks cluck cluck!
Zarinaia
Thanks for sharing this great tut!
I've linked your project on my blog..
:)
Eleonora, an Italian girl in Sweden
Sonja
Really lovely idea! I need some new pillows. Thank you for sharing!
Nanm
My son keeps asking what thanksgiving decorations we have. I am going to make a pillow and tell him this is what we have!
Abbie
Ohhh, I really love this idea. I am looking for applique-style designs to cover these Warm Window shades I am making for the cold weather in our home. This one is very nice...thanks for the ideas and inspiration!
Abbie
Sew It Up!
What amazing work! I am so going to make one of these cushions. Thank you so much for sharing!!
SewLindAnn
Great tutorial and pictures. I'm definitely going to be making pillows for some christmas gifts!
sarahbellum
Very lovely idea! I must add this to my neverending list of projects. Thanks for sharing! Found you via SMS, by the way.
danahollis
Super CUTE! I love them!
Stephanie
Hi! I just found this tutorial through Sew Mama Sew. What a great idea! A lot of people are going to be getting cute pillows from me for Christmas this year! :) Thanks for sharing.
Jodie
I love this tutorial. I made my pillow yesterday and I am thrilled with how it turned out (http://sew-handmade.blogspot.com/2009/11/applique-tree.html). Thank you for the great instructions and inspiration!
XOXO,
jodie
Teresa C
Thanks so much for the inspiration! It got me thinking and I managed to adapt your idea to my tiny little scraps. I think you may have created a monster!
http://soupgirls.typepad.com/knittingtheblues
Bec Clarke
I loooove these cusions, I have so much need for a project like this. Thank you so much.
Cora
Just wanted to let you know that I made one of these pillow shams and everyone loves it. I'll be posting a photo with a link to your site soon. Thank you!!
Lenetta @ Nettacow
Very cute!! (It helps that I'm a sucker for all things fall regarding decorating.) I linked to this on my weekly roundup - post is here. Congrats on the win!
Rinachiyya
This is great for gift giving too and so much fun to make.
I did not find a print link for instructions that would have been real helpful.
Natalia
Allison, this is a great tute! I'm going to post a link to it on my blog "Sewwhattoday.blogspot.com"
THANKS!
Natalia
brodiefiles
I also made this pillow and have posted it!
Shannon
Love this tutorial so much! Thank you!! I made a couple pillows and adore them. Stop over and see them if you get a minute:)
Sheri
I like these! You have a nice variety too. I'll be posting a link on childmade.com. Thanks for sharing!
TAMI
My daughter and I are making this during our Christmas break. If all goes well, we'll make all four seasons! So beautiful. Thank you for the inspiration ... and direction!!
Denise
I don't sew, but I do scrapbook, and when I stumbled on this, I knew instantly I was going to make a scrapbook layout with my patterned paper scraps. Thanks for the inspiration. :)
rojalka
Thanks so much for the tutorial :)
rojalka
Thanks so much for the tutorial :)
ideku handmade
wow... this is cutest pillow i've ever seen :)
thanks...
really inspiring me...
JBmorristown
Love this pillow, so colorful and fun. Thinking of making a large version for a teenagers bed.
erica
Thank you for such a great design! I'm excited to try this :D
Bird
This is awesome! My cousin just sent me this, and lo and behold, she was at anthropologie over the weekend and found a pillow for sale that looks just like the flower version you made! we are so excited to try this pattern out!
Ruthie
Thank you for the tutorial. I love it. I was wondering how the pillows hold up in the wash (and more importantly in the dryer). Do you have problems with the adhesive coming apart if the dryer is too hot?
Richard
Excellent design for a pillow, but it doesn't look that comfortable. I mean at least not as comfortable as a Posturepedic mattress, but I guess it is meant to be mostly decorative.
April
I have always wondered what to do with my fabric leftovers...this is a beautiful idea and I am going to do just that.Love the fall cushion idea.
charity
Kerri Marie
I loved this so much but I turned mine into a family tree pillow. Thanks for the tutorial.
http://tkmillerclan.blogspot.com/2010/03/our-december.html
IT's a ways down in the post.
kim
these turned out gorgeous!
Crafty Jenn
Thanks so much for a great web project. I am just getting back into sewing so this cushion is perfect. I have made one and intend to make 3 more with Spring, Summer, Autumn & Winter theme. The winter one I thought I would do colder colours like light blue and put the leaves at the base of the tree. PS Congratulations on the safe arrival of Ryan - we are due to be grandparents before we are 50, in the summer! So loads of projects to have a go at for our expected Granddaughter. Crafy Jenn - Plymouth, England, UK
Marjorie
Hello, I have a blog that aims to identify all the tutorials that can be found on blogs. I put a link to your blog (and not the explanation) but I let you put your pictures? thank you and congratulations for your blog marjorie http://tutoriels-loisirs-creatifs.over-blog.com
panamamama
LOVE it! Making some for all seasons for my couch to spruce it up a bit! (washable of course for my crazy bunch.)
ÖRGÜÇANTAM
very beautiful.
Lisa
Love this! I made the tree and then did one with a bird flying. (to represent giving your children roots and wings).
MaryJanes and Galoshes
This has been on my to do list forever. I need to get to it!
Taylor
http://www.maryjanesandgaloshes.com
Alison
I really adore this pillow!! I featured it today with a roundup of fun ideas:
http://oopsey-daisy.blogspot.com/2010/09/wednesdays-wowzers-here-comes-fall.html
Have a great day!!
~Alison
♥ Carine Calé ♥
AMAZING TUTORIAL!!!!!
Thank you very muchhhh!!!!
Carine Calé
anou design
So so cute, i put you on my FB fan page, if you do not mind...
Anou Design
Ryan and Kate Webb
Are you selling this pillow at all? I am IN LOVE with it and want it sooooo bad! :)
NatQuebec
They are wonderful !
Andi @ Jane of all crafts
Hello! Sorry to hear you have a kidney infection! Hope you recover quickly! I just wanted to send you a link to my post on a pillow I made using this tutorial and also to let you know that I linked back to you! Love your blog! Your quilts are amazing!
http://www.janeofallcrafts.com/2010/09/janey-bird-pillow.html
KasiaJ
Gorgeous! I just finished making my version:
http://kasiascrafts.blogspot.com/2010/10/scrap-busting-like-scrap-buster.html
Thanks for the inspiration!
Skooks
I finally got around to making my own . . . made it into a taggie blanket for a baby shower. :)
http://www.skooksplayground.com/2010/10/little-tree-blankie-tags-too.html
Angela
LOVE THIS! Now to just find the time to do it!
Liz
Oh my heavens! That's darling. Have to feature it on ziggycrafts.blogspot.com!
FineArtPainting
Thank you for your contribution to last week's linky party. I love these trees! Thank you for the tutorial!! Very good.
A new party, at http://www.FineCraftGuild.com/diy-linky-party-21/ will be up shortly.
Come feature your new tutorials. We love to see what you've created and be inspired again!
Till soon,
Have a craftful, happy day, Rose
Amrita Tripathy
amazed with this one, honestly speaking , i want one such tree with all shades of green from one of my kurta tops.. how can i proceed.. what type cloth material i shd use? and all those?
Varga Györgyi
Lovely fall colours in a georgeus tutorial! Thanks for sharing! I'm your official reader from now! Györgyi
Sew Sane Jane
Thank you for sharing and having such cute ideas! I made a fall pillow (turned out pretty great) and borrowed your idea for the abstract flower when I made an ipad cover (and added a few green leaves). I smile every time I look at it!
Lisanne
You make life worth living!! I love your ideas! Lisanne xx
Cortney
Thank you for this tutorial... helped me make some pretty awesome pillows for my home. THANKS!!!
Jenny
I absolutely love it. Can't stop staring at the one I made. The best part is, the scraps remind me of some of the fun projects I've done over the past couple months. http://yfrog.com/h2j06umj
tale of many cities
too cute for words!! :) love your scraps too!!!!
Ali
So I'm a little late on commenting on this post lol but this is GORGEOUS! Totally going to have to make these! Thanks for the tute!
Jo
I just wanted to tell you that I absolutely loved this pillow when I first saw it and in the end it sowed the seeds for me to make my rainbow pillow. You can check it out here if you want: http://thecraftynomad.blogspot.com/2011/02/rainbow-pillow.html
Thanks for the inspiration!
april
I LOVE these pillows-I made two of them for spring to put on my living room sofa:) I'm already planning to make more for summer-awesomesauce!
aussiestitch
This is such a gorgeous design. Thank you so much for sharing!
Donna
Good work. So beautiful and Unique ;) http://www.tobaccoreviews.net/
Mummy
Check out what I did because of your tutorial. It's my first time sewing on a sewing machine ever! Thank you so much!!!
http://mummyk.com/2011/04/25/sewing-project-scrap-buster-pillows/
Jenn Erickson
I came across your beautiful pillow tutorial through StumbleUpon. So happy to have found your blog!
Jenn/Rook No. 17
angie @ the cellar door stories
i know this is not exactly a new project of yours, but i found it via pinterest and shared it on my blog today...
http://thecellardoorstories.blogspot.com/2011/07/friday-favorites-1.html
feel free to check it out and grab a button if you'd like!
patiabeija-flor
Parabéns pela linda almofada!!!!
Anne
Thanks for the great idea! Just made this and blogged about it here:
http://prettyladydesigns.blogspot.com/2011/08/fall-leaves-pillow-cover.html
Rachel
I featured this project at Lines Across My Face in a fall leaf roundup.
Rachel
http://linesacrossmyface.blogspot.com/2011/09/i-heart-leaves.html
JennyFace
Found your tutorial on pinterest... so easy to follow - thanks! Here's mine... http://www.facebook.com/media/set/?set=a.2245039739881.120267.1664764722&l=7b7a19e76b&type=1
Ruth @ rootitooti.co.uk
Love this, found it via 'Very Berry' blog. It's now on my to do list :0) Thanks for sharing!
http://www.rootitooti.co.uk
carmen p.
ESTUPENDA IDEA ......gracias
Blueberry Heart
hi there, thank you so much for an absolutley beautiful design! I found this on Pinterest originally (couldn't link to you via there unfortunately), and have posted about this and a version I created too. I have used your photo in my post and a link back to you (- please let me know if you'd like this pic removed)
Thanks again
BH x
Lindsay(PACountryCrafts)
Found you on Pinterest and I made one too!
http://pacountrycrafts.blogspot.com/2011/10/falling-leaves-pillow.html
Thanks so much!!!
SW Craft Club
Oh Wow, it's so easy and effective. Thank you for sharing this post.
http://swcraftclublondon.blogspot.com/
Julie
This just made my day! My young daughter found a box in which I had stored an ao dai (traditional dress from Vietnam) that my father had made for me when he was stationed there during the Vietnam war. I was so sad that the dress had been ruined and was looking for a project to do with the remainder of the fabric, which just happens to be orange, green and yellow.
I am not very good at sewing... but I think I can handle a pillow.
Now, the fabric can be displayed instead of sitting in a box.
lisasfam
Thank you so much for the sprocket pillow instructions and template. I had 2 pair of pajama pants that my daughter wore when she was 4yrs old. She is now 27yrs old and expecting her first child. I took the pajama pants and cut them up to make her a sprocket pillow that I will give her for Christmas. Can't wait for her to see it. I know it will be special.
Teresa, horsecaring5.com
Thank you for sharing. I have got lots of left over's and now will make a cushion. It is lovely :)
crooked whimsy
thanks so much for the very helpful pillow tutorial! i am in the midst of making one now...only i'm making heart-themed applique in the spirit of the holiday! :)
ABeautifulDay
I have made two of these pillows from your tutorial and must say they are fun, easy, and very gratifying! You are an angel for sharing these wonderful ideas and instructions with the world. Thank you for the beautiful inspiration and giving this stay-at-home mama concrete reasons for carving out some sweet ME-time.
Going to try sprocket pillows later today!
els
i have made one of these cushions and i LOVE it! everyone always comments on it. I hand stitched all the details because i dont have great control on my Beast of a sewing machine yet and was worried of messing it up but I love it even more for having done it all by hand. its such a simple tutorial and yet it looks so effective. Great for showing off :)) Thank you so much for sharing xx
La Pantigana
This blog tutorials plagiarize
http://laurita-elrincondelaurita.blogspot.com.es/2012/02/tutorial-almohada.html
Amy Kirchhoff
Thanks so much for the great idea! Finished mine just last week...
http://www.amytriedit.com/2012/07/kirchhoff-home-makeover-crazy-living.html
Cécile
Many thanks for this tutorial! I love it, I did it! http://feefils.canalblog.com/archives/2012/09/03/25020710.html
Helen Naylor
Love your cushions especially the trees. Makes me wish I could sew!
Thyme Lule
I love this, looks great and I think that I could maybe even do it!
Following you now, would love a follow back!
sixty.blogspot.com
Thyme Lule
oops =) 14sixty.blogspot.com
Jo
Just made another item inspired by this tutorial! Thanks so much. You can check it out here: http://thecraftynomad.blogspot.co.uk/2012/10/fancy-pot-holder.html
Morgan Monroe
I have been wanting to do this pillow for a year now and today I finally did it! I just love it and had so much fun doing it. Thank you for thinking of this. Rebekah
Zane Wooder
The pillow that you made is beautiful. I love how you used many different patterns to express different leafs.
-Zane of ontario honey
Krisandra Davis
This is such a fun way to bring new life to a classic concept! Love the color choices in the Tree Pillow.
ole foggie 64
I am glad to see someone still does the envelope pillows. I do not like the pillows that are sewn closed.
thepiececorps
Luv it! Thanks for sharing with us. I made one in batiks on white and have enough leaves to make another one! Barbie
Tammy
Do u know where or if their is a template available for the tree trunk and leaves..I cannot draw a stright line if I tried...I love your pillow...conn_and_vans_mom(at)yahoo(dot)com
Hanki
Great tutorial and gorgeous pillows. I love them so much I had to make them. You can see what I created on my blog. Thank you for inspiration :)
doris batting
this was much admired when I made it, thanks for the tute
CreativaCale
Volim Vase tutoriale.Fantastican jastuk.Hvala:)))
Anshu
Such a pretty pillow. I featured it here:
http://sewprettysewfree.blogspot.com/2013/03/sewing-tutorials-for-patchwork-pillows.html
Christine Welsh
What a great way to use up scraps! I LOVE this!!!
Christine
- ChrisW Designs
Lacey
Hi!! I made on of these a while back and it turned out so well!! I wish I could attach a picture for you, but here's the link to my picture on my FB page: https://www.facebook.com/photo.php?fbid=441958782505984&set=a.188574084511123.35353.100000755982474&type=3&theater
Makkie
Thanks so much for this tutorial! I just finished making one, but instead of different fabrics for the leaves I printed out family pictures on fabric. It's a gift for my mom's 60th birthday and she's sure to love it! Thanks again!
Angi
We love this idea! My fiance and I are going to cut out leaves and allow for our guests to sign them at our wedding reception. We will then make the pillow out of said leaves for a lovely alternative to a guest book.
thingsherelately.com
I love these pillows! I just finished my own over the weekend. They make my sofa look happy. :) I posted a link to this tutorial on my blog. Thank you, Allison!
Melissa Taylor
I LOVE THIS SO MUCH! I just inherited my grandmother's sewing machine and I can't WAIT to make something. I think I'll start with these!
Melissa from the Blue House... http://www.thebluehouseblog.com :)
Marti @ SewLicious Home Decor
I love this! Great tutorial! I shared it this week at my Thanksgiving 30 Days of Gifts. You can see it here...http://sewlicioushomedecor.com/sew-thankful-series-house-day-3/. :)
Marti
Stephanie D
Thanks for the great tutorial. You can see my pillow here:
front:
https://www.facebook.com/photo.php?fbid=10154121628015001&l=8f5fa5aa5e
Back: https://www.facebook.com/photo.php?fbid=10154121628070001&l=33f72a3bec
coolandchic
I Love this pillow!!!
Jamie Tomkins
Sure wish I had the skills to make something this beautiful - love it!
Julia D @ Jada's Quilting Adventures
Thank you for this tutorial. I'm just finishing my first pillow cover of many I'm sure :) Such a great project. Thank you so much for sharing :)
Michelle
Love these beautiful patchwork cushions. Definitely making some of these 😊
Elizabeth V K
Love the scrappy fall tree. I hope to resize for a mug rug, place mat or table runner. Thanks for inspiring.
Linda
Thanks so much for your tutorial. I love the pictures right along with the instructions. I am a visual learner and need to see what you are explaining when following and learning a new skill set. We are moving to Florida as snowbirds and just bought a house. I will be making these pillows for the couch in the living room and linai.
Editor@CraftyLikeGranny
Hi Allison. Such a lovely pillow design. Thanks for sharing your tutorial, our readers will love it. I've included your post in our latest Top 10 In Craft for Thanksgiving inspiration. https://craftylikegranny.com/thanksgiving/ Cheers Jodie :)
Sam
That turned out so good! My wife is going to love doing with this my daughter; what a fun project. Thank you for sharing!!! Temecula towing
Neha
Luv it! Thanks for sharing with us. I made one in batiks on white and have enough leaves to make another one! Barbie
Nantikanlah
Thank you for the good information and very helpful. That's very interesting. I like all the things you share and see your beautiful creations, greetings from Admin “Nantikanlah.com” I hope you can visit and comment on my website :)
Satta Matka
Great thank full reagarding website . satta Matka
Hannah Flack
I read that this is actually Rounded Pi Day - this year only! Since the number is 3.14159 etc., if you round that you get 3.1416. But as I'm writing this the day is already finished in Britain. Only a century to wait for the next one.
Terry
Ok I'm bookmarking this for a fall project with my girls! It looks so fun, great job! Murrieta Tree Service
okbetbetting
OKBET is one of the most trusted online betting site in the Philippines!!! Want to know more about site? visit here --->> https://www.okbetcasino.live
okbetsports.ph
Excellent to the point article and news.. Well appreciated, My sites:
okbet app
OKBet
Nice post! Thanks for sharing this quality information with us. check my siteIs Online Betting Legal in The Philippines?
OKBet
Nice post! Thanks for sharing this quality information with us. check my site How Sports Betting Has Changed Over the Last 20 Years